Difference between revisions of "2600"
(→Troubleshooting disruptive interference) |
(→Crimp pins and mating connectors: +new section: Output response time) |
||
| Line 169: | Line 169: | ||
* Mating connectors: PN 172166-1 | * Mating connectors: PN 172166-1 | ||
* Crimp tool: PN 91522-1. | * Crimp tool: PN 91522-1. | ||
| − | + | ||
| + | ==Output response time== | ||
| + | |||
| + | :''What is the response time from command to SSR state change?'' | ||
| + | |||
| + | The maximum response time is the sum of the transaction time, FSM clock period and SSR turn on/off time: | ||
| + | |||
| + | * '''Command transaction time.''' This is the time it takes to send a command to the module and receive a reply. Typically, it is approximately 700 microseconds on a dedicated LAN, but may be longer if the LAN has high network traffic, or transactions are conveyed through multiple switches/routers, or the CPU is heavily loaded. | ||
| + | * '''FSM clock period.''' Models 2652/2653 employ a finite state machine which synchronously updates SSR states at 500 Hz. Consequently, the 2652/2653 will change the SSR control signals within 0-2 milliseconds of receiving a command. | ||
| + | * '''SSR turn on/off times.''' An SSR doesn't turn on or off instantly in response to a control change; typical SSR response times range from 50 microseconds to 10 milliseconds. | ||
==System== | ==System== | ||
Revision as of 15:55, 22 February 2019
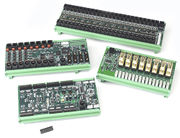
Sensoray's 2600 series is a low-cost, modular Ethernet-based measurement and control system designed for applications such as machine control, industrial process control, building automation and remote data acquisition.
Contents |
2601
Model 2601 is an Ethernet-based communication hub for the 2600 series of I/O modules. It supports up to 16 I/O modules and has 4 serial COM ports.
Is a 2601 required?
Yes, a 2601 is always required because it provides the Ethernet interface for I/O modules (e.g., 2608, 2610, 2652, etc.). The I/O modules do not have an Ethernet interface; they rely on a 2601 for this function.
This requirement is not an issue in systems with a large number of I/O points, for which the 2600 series is an ideal, low cost solution. If you have a small number of I/O points and need to minimize the I/O system's footprint, consider these alternative solutions:
- Model 2410 — Ethernet 48-channel digital I/O
- Model 2426 — Ethernet multifunction analog/digital I/O w/serial COM
Setting the IP address
Null-modem cable
When configuring the 2601's IP address, a null-modem cable must always be used to connect the configuration computer to the 2601. If your computer has a built-in RS-232 serial port, connect one end of the null-modem cable to the computer and the other end to 2601 COM4.
If your computer doesn't have a serial port then you can use a USB-to-serial adapter. To do this, connect one end of the null-modem cable to the adapter's serial connector and the other end to 2601 COM4.
Configuration program
A special utility program, cfg2600.exe, is used to set the 2601's IP address. This utility program requires a command line argument that specifies the COM port on your computer that will be connected to COM4 on the 2601 module (via serial crossover cable).
The program can be invoked in several ways. For example, suppose you will use the COM1 port on your computer. You could invoke the utility program this way:
- Create a Windows shortcut to cfg2600.exe
- Change the shortcut's target properties to specify the COM1 port (e.g., change "cfg2601.exe" to "cfg2601.exe 1")
- Now run the shortcut
Alternatively, you can run the exe directly from a shell:
- Open a console window and change to the directory that contains the exe
- Type this command line and hit Enter: "cfg2601 1"
Or, you can do this:
- Click Start|Run
- Enter the exe path followed by "cfg2601 1", then click OK
Automatic reset
- My 2601 resets every 10 seconds (approximately) — is this normal?
This is normal behavior when no Ethernet clients are communicating with the 2601.
The 2601 employs a communication watchdog timer to measure the time since it last communicated with a client. By default, the watchdog will reset the 2601 if no communication has occurred within the last ten seconds, which in turn will reset all IOMs (slave modules) connected to the 2601. This behavior ensures that all I/O will be turned off in the event the client shuts down abnormally.
The watchdog interval defaults to ten seconds upon 2601 power-up or reset. If a different interval is needed, use a function like this to reprogram it:
u32 SetWatchdogInterval(u32 hbd, u8 tmax)
{
  void *x = S26_SchedOpen(hbd, 1);
  S26_Sched2601_SetWatchdog(x, tmax);  // timeout in 0.1s units
  return S26_SchedExecute(x, 1000, 0);
}
For example, this will set the watchdog interval to 3.5 seconds:
SetWatchdogInterval(0, 35); // 35 * 0.1s = 3.5 seconds
To completely disable the watchdog (so it cannot reset the 2601), set the interval to zero as shown below. Note that if the 2601 is reset for any reason (e.g., via command or power cycling), the interval will revert to ten seconds and must be disabled again.
SetWatchdogInterval(0, 0); // 0 = disable watchdog
Slow link detection
As mentioned above, by default the 2601 will automatically reset every ten seconds when it is not communicating. When this happens, the interface (computer or network switch) to which the 2601 is connected will momentarily lose its Ethernet link (this can be seen when the interface's link indicator turns off). When the 2601 comes out of reset, it will immediately become ready to communicate. However, some interfaces are slow to relink and, while the interface's link is down, the client will be unable to communicate with the 2601. In some cases, interface linking may be so slow that it becomes impossible to to communicate with the 2601.
To solve this problem, you may need to insert a "fast" switch (one that quickly establishes link) between the 2601 and the slow interface. Alternatively, you may, in some cases, solve this problem by configuring the interface for fixed 100MBps/half duplex operation, which will make link negotiation unnecessary and thus speed up linking.
Windows XP tweaks
Speed up link detection
- I have a direct connection between my computer and the 2600 via an Ethernet crossover cable. I see the 2600's link LED turn on shortly after it resets, but when it does, there is a long delay before my computer indicates a valid connection. Is there a way to speed this up?
Open the Network Connections dialog and right-click on the 2600's network connection. Click on the Configure button, then select the Advanced tab. Select the "Link Speed & Duplex" property, then go to the Value pulldown and select "100Mbps/Half Duplex."
Eliminate annoying balloon tips
- When my application is not running, irritating balloon tips keep popping up to report the 2600's cyclic disconnected/reconnected network connection. How can I prevent this from happening?
Run regedit.exe and create (if it doesn't already exist) or edit (if it already exists) the following key:
HKEY_CURRENT_USER/Software/Microsoft/Windows/CurrentVersion/Explorer/Advanced
Set the key as follows:
EnableBalloonTips REG_DWORD 0
Restart or logoff/logon to apply the changes.
Eliminate "red x" status notification
- When my application is not running, I sometimes see an irritating "red x" network status icon in the notification area. How can I prevent this?
- I unchecked the "Show icon in notification area when connected" box in the connection properties dialog, but this hides the icon only when the connection is active. The RedX icon keeps appearing briefly, then disappearing.
- I checked the "Hide inactive icons" in the Taskbar properties and set the network connection icon to "Always hide" in the Customize Notifications dialog, but it doesn't seem to stick.
This solution will completely eliminate the connection status icon.
Run regedit.exe and delete this key:
HKEY_CLASSES_ROOT\CLSID\{7007ACCF-3202-11D1-AAD2-00805FC1270E}
Restart or logoff/logon to apply the change.
2608
Model 2608 is an analog I/O module that connects to Ethernet through a 2601 communication module. It has sixteen differential analog inputs and 0, 4 or 8 analog outputs. It is a member of the 2600 series of smart I/O modules.
Common mode voltage range
The CMV range for analog inputs is -10 to +10V for both the 100mV and 10V input ranges.
Visual identification
- Is there a visible difference between models 2608-0, -4 and -8?
Yes. The 2608 circuit board has footprints for two DAC chips (marked "LTC2704") which are located near the analog output connectors. On earlier board revisions, these chips have reference designators U6 and U27; on newer revisions they are U9 and U29. The DAC chips are populated differently for each model. You can identify the model by the number of installed DAC chips:
| Model | DAC chips |
|---|---|
| 2608-0 | 0 |
| 2608-4 | 1 |
| 2608-8 | 2 |
2610
Model 2610 is a modular, 48 channel digital I/O interface that connects to Ethernet through a 2601 communication module. It has 48 general-purpose digital I/O channels that can independently serve as inputs, outputs, or in wired-OR mode.
Input voltage thresholds
| Parameter | Value |
|---|---|
| VIL, MAX | 0.8 V |
| VIH, MIN | 3.5 V |
2652/2653
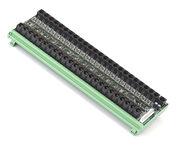
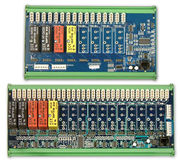
Models 2652 and 2653 are DIN rail mountable modules that allow solid state relays (SSRs) to be monitored and controlled over Ethernet. Sockets are provided for eight (model 2652) or sixteen (model 2653) SSRs. Each socket may be populated with any supported SSR type, including AC in, AC out, DC in and DC out, or left unpopulated. The modules, which work in conjunction with a model 2601 communication module, are members of the 2600 series of smart I/O modules.
Crimp pins and mating connectors
We recommend the following parts from TE Connectivity:
- Crimp pins: PN 770988-1
- Mating connectors: PN 172166-1
- Crimp tool: PN 91522-1.
Output response time
- What is the response time from command to SSR state change?
The maximum response time is the sum of the transaction time, FSM clock period and SSR turn on/off time:
- Command transaction time. This is the time it takes to send a command to the module and receive a reply. Typically, it is approximately 700 microseconds on a dedicated LAN, but may be longer if the LAN has high network traffic, or transactions are conveyed through multiple switches/routers, or the CPU is heavily loaded.
- FSM clock period. Models 2652/2653 employ a finite state machine which synchronously updates SSR states at 500 Hz. Consequently, the 2652/2653 will change the SSR control signals within 0-2 milliseconds of receiving a command.
- SSR turn on/off times. An SSR doesn't turn on or off instantly in response to a control change; typical SSR response times range from 50 microseconds to 10 milliseconds.
System
Troubleshooting disruptive interference
Electro-mechanical equipment may generate EMI which, if not properly suppressed, can interfere with normal operation of the 2600 system. This manifests in various ways, including analog measurement noise, momentary communication disruptions, and in extreme cases, watchdog resets of the 2601 module.
If your 2600 system is experiencing EMI-induced disruptions, first try to determine where the EMI is entering the system. To do this, gradually add components to the I/O system until the problem appears:
- Disconnect all cables from the 2601.
- Connect power to the 2601. The 2601 should perform a self-induced reset approximately every ten seconds. At this point, if your equipment causes unexpected 2601 resets then you may need to power the 2600 system from an isolated 24 VDC power supply.
- Connect Ethernet to the 2601 and run Sensoray's 2600 demo program. Make sure that only the demo program is communicating with the 2601 (your own application software should not be running). If your equipment causes unexpected 2601 resets or communication faults then you may need to use a shielded Ethernet cable.
- One at a time, connect the IOMs (e.g., 2608, 2610, 2652) to the 2601. As each module is connected, determine whether the problem appears and, if so, proceed to the next step.
- Disconnect all field wiring from the IOM so that the IOM is only connected to the 2601 via a Cat-5 cable and, in some cases, an additional, separate power cable.
- One at a time, connect field cables to the IOM. As each field wire is connected, determine whether the problem appears and, if so, proceed to the next step.
- View the field cable signal with an oscilloscope to determine why it is causing interference.


